Thursday, January 23, 2014

We are expecting...YA!!!!!!!!!!!!!!  I wanted to share these adorable booties one of my co-workers made for me.  They are just so stinking cute!


Since we don't know what we are having she put a blue ribbon on one and a pink ribbon on the other.  I can't wait until Baby Sievert arrives and can wear these!  Thank you so much Karen!

Wednesday, January 15, 2014

EXPLODING BOX!

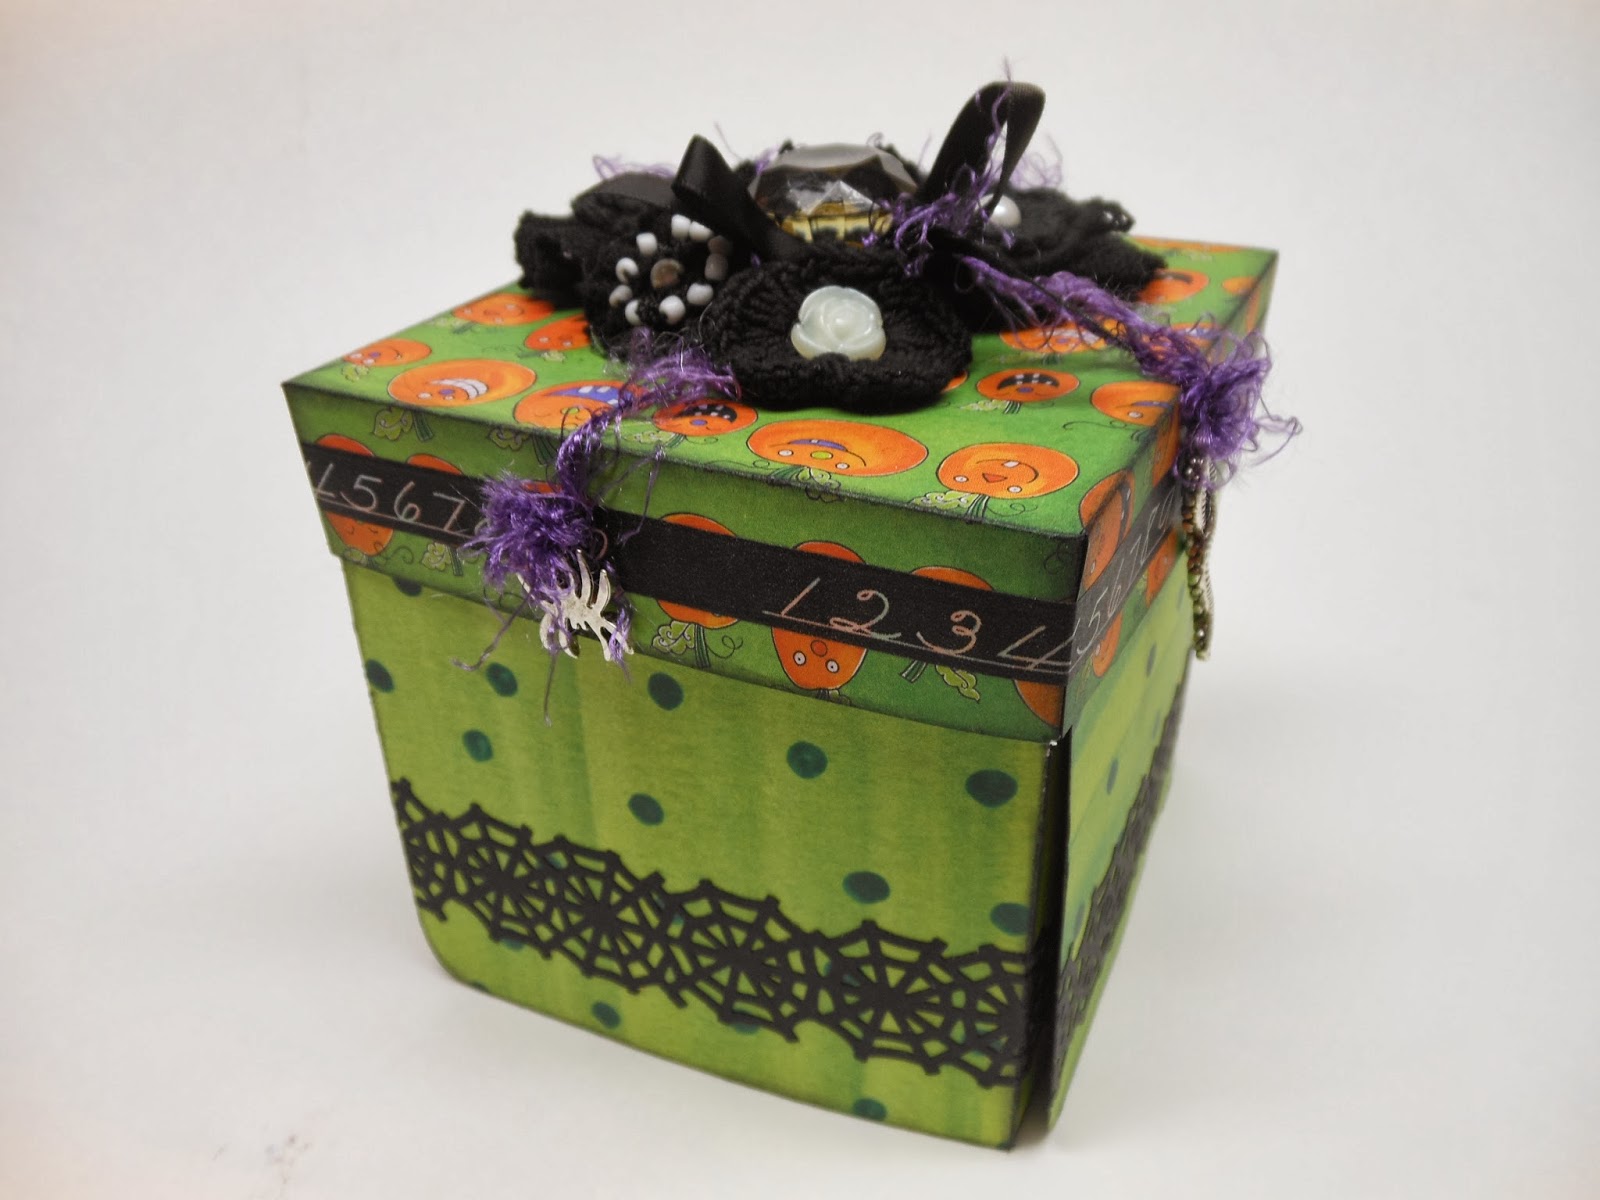
My friend Casey's bachelorette party was on Halloween weekend.  She did a costume theme for the party.  Casey dressed up as a zombie bride and Kelly and I dressed up as zombie bridesmaids.  We made quite an awesome zombie bridal party!  I wanted to make her something crafty to remember the event.  I saw a couple different links for exploding boxes on Pinterest and thought that would be a perfect crafty item.  I used Halloween themed cardstock and embellishments.  I even surprised myself by how cool the finished product is!


Here is a view from the side and from the top.  I did three layers for my box.  This is the out side layer, front and back.  Some of the pictures were too big for the small squares so I cut the pictures in half and put them next to each other on the folds.  Lining up the spider web border was a bit frustrating.  I wanted to make sure that when I folded the box up that all the spider webs made a continuous line around the box.


Here is the middle layer, front and back.  I did not put pictures in the center because once I glue all the pieces together you won't see the center.


Here is the inside layer, front and back.  I did put a picture in the middle on one side.  When you open the box up you will be able to see this side.  Sorry about the glare on some of the pictures...


Here is the box put together.  The middle and inner layers are still folded up like a box and you can see the outside layer.


Here the outer and middle layers are unfolded.  You can see why I put the picture in the middle of the final layer.


Now all layers are unfolded.  Again, the glare sucks but you get the general idea.


Then you fold each layer up and put on the lid and you have a beautiful box of pictures!


For the lid...I used a drawer pull knob as the handle.  Then I glued some black crotchet flowers around the knob.  I used purple fun fur yarn to attach some metal charms.  I used a snake, skull, and 2 spiders.  Then I put washi tape around the edge.


Happy Crafting!


Wednesday, January 8, 2014


Easter is only a few months away.  Last year I made this Easter wreath to hang on my front door.


Super easy to make, just time consuming!  I bought a foam ring.  I wrapped the foam ring with light green fun fur yarn, around and around and around...  That was the putzy part.  I then attached little chicks and Easter eggs that I had found a the dollar store.  To hang it I just used wide pink ribbon.  Super easy and super cute Easter decoration for your house!

Friday, January 3, 2014

Cereal Box Mail Sorter

So, I decided to make something to sort our messy pile of mail.  I then started to search Pinterest for something that appealed to me.  I finally found a style I liked and thought, hmmm I could probably make that out of cereal boxes.  Since I don't eat cereal, I had all of my friends saving their cereal boxes for me :).  After some time and elbow grease, this is what I came up with.


So, after I had gathered my cereal boxes from my friends, I went looking for scrapbooking paper that fit the design idea I had in my head.  Since my living room decor is safari/animal print, I found papers that would fit into that theme.

First I made a stencil, then I traced that stencil onto the cereal boxes and then cut along the stencil line.  I then glued the 3 cereal boxes together.


I then covered the back, sides, and part of the front with brown faux leather paper.


I then covered the back and front of the inside of the 3 cereal boxes with green palm tree paper.


I then covered the sides of the inside of the cereal boxes with animal print paper.  I did each box a separate animal using giraffe, zebra, and leopard print paper.


For the bottom of the insides of the cereal boxes I used a grey paper.  On all four sides of the outside I used green hand made paper to add texture, ripping the top edge also.  In the front I stapled on a scrap piece of burlap I had.


I had papers that had borders on the bottom of animals.  On the sides and back I used the giraffe border (this took 2 sheets of 12x12 paper) and on the front I used the elephant border.  I adhered a Tim Holtz name plate to the front of each box.


For the names in the name plates I hand cut them out of paper, wrote the label on them, and then put liquid glass from close to my heart over them (this helps so the ink doesn't smear and the paper doesn't get dirty).  I then glued them into the name plates.  Oh and I did that before I adhered them to the cereal boxes.  For the feet, I found some miniature wooden urns that I liked.  I first painted them brown and then I used a bronze glaze over that then glued them onto the bottom of the boxes.  TADA!!!!  I was super excited with how it all turned out.  It fits the decor in my living room and looks so much better than the messy pile we had.  Now...if I could just get my husband to empty his mail out of there...!

Stay Crafty!

Tuesday, March 19, 2013

Knitting Needle & Crochet Hook Holder

For X-mas I decided that I was going to make something for my mom and my brother's girlfriend to hold knitting needles and crochet hooks.  I looked at a few different ideas on pinterest for makeup brush storage.  I then came up with my own pattern, modified for knitting needles and crochet hooks.  So, I used a paper bag to make my pattern.  I cut out an 14 in x 19 in rectangle from the bag.


I then pinned it to the material and cut it out.  I did this with the material for the front, the back, and the batting.


I then pinned all three together with the good side of the fabric facing out.


 I then used the bottom of the bag as my pattern for the bottom pocket.

In the picture above you can see that I used the same width as the bag bottom but I doubled the height.  I then folded the material in half with the good side of the fabric facing out and ironed it.  For the smaller pocket I just kind of guessed/estimated the size I wanted and cut that out, again with the height doubled.  I then folded it in half, good side of fabric facing in and sewed around three edges, turned it inside out and ironed it.  I left the side that goes along the edge open.


I then pinned the two pockets in place and sewed around the edge of the entire thing.  As you can see the open edge of the smaller pocket gets sewn when you do this.  I then sewed the other side and the bottom edge of the smaller pocket.
After that, I spaced out pocket dividers and sewed down the height of the pocket.  This is to separate your crochet hooks and keep them upright so that they don't fall over in the pocket.  I then sewed dividers in the larger bottom pocket for the knitting needles.  


 I then cut out the binding and the ties.  I used a piece of the bag that was about 2 in wide for the ties and about 3 in wide for the binding, both were about 10 in long.  I just kept moving the piece to cut out a pieces that were long enough for the binding and the ties.


 I then folded the strip in half, ironed it, then folded the edges into the middle and ironed it again.  I then sewed down the open edge.
And now you have your ties.  I folded the ties in half and ironed them again as seen in the picture above.  For the binding I also folded the material in half, ironed it, folded the edges into the middle and ironed again.  I did not sew shut the open end.  Instead I pinned it around the edge of the whole thing, stuck the ties in where I wanted them so that when I sewed the binding the ties would also get sewn.  Now, I am not a quilter and I'm sure there are some quilters our there who will say I did the binding all wrong, but that's ok, it worked well enough for my purposes lol!  

Here you can see how I pinned it all together.  I then folded the top down and stitched across to make a flap.  The purpose of the flap is to keep all your needles from falling out the top.

 Here is a picture of it opened up, this is the one I made for my mom.


 So you can just slip in all of your crochet hooks and knitting needles, close the flap, roll it up, tie it shut, and you have the perfect portable storage!  Ta-Da!!!  Here is the one I made for my brother's girlfriend.
I'm thinking I'll need to make another one for my mom as she has about a million needles crammed into hers lol!  It is bursting at the seams!   


Thursday, February 7, 2013

Wicked

So awhile ago I bought my mom tickets to Wicked for Christmas.  Of course I made her take me as her date :)  So I made this gift for my mom to remember how much fun we had together.


Here is a little closer view...

And and even closer view...

The last picture was a little blurry...but you get the picture.  I won the frame at a scrap-booking retreat. I can't even remember what company made it.  But it was pretty cool.  Its magnetized and came with a bunch of different doo-dads to embellish with and has a black ribbon that runs across it.  The paper I used is from Graphic 45.  It is awesome paper!!!!  I used the green diagonal striped paper as the background.  I then cut out the witch with the Wicked saying on it out of the paper and attached that with magnets.  I embellished the shadows and the word wicked with black stickles and added purple stickles to the witches hat and stockings.  I had someone take a picture of my mom and I at the event so I attached that to the background paper.  I also bought the embelliment pack that went with the paper.  This is where I found the other three embellishments on the page.  The monkeys wings are also stickled with black.  I put crackle over Glenda, attached it to black paper and then attached that to the background paper.  The bigger one with the lion etc.  I attached with mini clothes pins to the ribbon.  I used a sharpie to color the clothes pins black.  Ta-da!!!  The cool thing about this is that everything is attached to the frame with magnets so if you wanted to change it out it would be very easy to do so.  Although my mom is not allowed to change this one out lol!  Thanks for viewing!

Friday, November 16, 2012

So yesterday I decided it was time....I needed to embellish my phone case/cover....here is the final result...


The pearls are from want to scrap.  The rhinestones are from the dollar bin at JoAnns'.  The pearls had adhesive.  The rhinestones I used liquid glass from creative memories to get them to stick.  It took about 5 to 10 min to do...and now I have a one of a kind case for my phone!